
Trying to create a new maintenance plan from scratch for every single motor and drive in your facility? That’s a surefire way to burn out your team and invite chaos. A standardized preventive maintenance schedule template is the answer. It gets rid of the guesswork and gives you a consistent, reliable system that cuts down on errors and makes sure the important stuff never gets overlooked.
Think of this template as the foundation for your entire maintenance strategy—it's how you finally shift from putting out fires to preventing them in the first place.
Why a Solid Maintenance Template Is Your Biggest Asset
Let's picture two different scenes on the factory floor.
In one plant, technicians are flying by the seat of their pants, relying on memory, scribbled notes, and word-of-mouth. When a critical motor inevitably goes down, production screeches to a halt. The team scrambles to figure out what's wrong, but they have no clear maintenance history to guide them. The result? Extended downtime, rushed (and often sloppy) repairs, and a never-ending cycle of crisis management.
Now, imagine another facility. Here, every task is guided by a solid PM template. A tech knows exactly which motor to inspect, the specific checks to perform, what tools they'll need, and the safety procedures to follow. This isn't just about preventing failures; it's about building a predictable, efficient, and much safer place to work.
The Financial and Operational Wins
The payoff from using a standardized template is about more than just being organized. When everyone follows the same format, you create a system that delivers some serious financial and operational gains.
Here’s where a well-designed template really starts to pay dividends:
-
Eliminates Guesswork: A good checklist ensures every technician, whether they’re a seasoned pro or fresh on the job, performs the same critical checks every single time. This consistency is non-negotiable for complex equipment like motor control centers, where one small missed step can lead to a massive failure.
-
Reduces Human Error: By clearly laying out the steps, tools, and safety protocols, a template slashes the risk of mistakes that could damage equipment or, even worse, cause an injury.
-
Creates a System of Record: Every time a template is completed, it adds to a detailed service history for that asset. This data is gold when you're troubleshooting, facing a compliance audit, or trying to plan for future maintenance.
The real power here is the compound effect. Over time, that consistent execution leads to longer equipment life, better safety records, and a much smarter, more predictable spare parts inventory.
From Reactive Chaos to Proactive Control
A systematic approach turns your maintenance department from a cost center into a value driver. Instead of just reacting to breakdowns, your team starts anticipating needs, scheduling work during planned downtime, and making the most of your resources.
This proactive stance delivers real savings. In fact, companies that get serious about preventive maintenance can cut their operational costs by 12-18% compared to those stuck in a reactive loop. They also see huge reductions in repair times and unplanned downtime just by catching problems before they escalate.
A well-built template is also key to reducing unplanned expenses through a planned maintenance program. Once you build the "why" behind this structured approach, you set the stage for a rollout your whole team can get behind.
Designing a Template That Actually Works
Let’s be honest: a preventive maintenance template is either the backbone of your entire strategy or just another spreadsheet that gets ignored. A poorly designed one creates confusion and leads to missed tasks. But a well-structured template? That drives accountability, clarity, and real efficiency on the factory floor.
So, how do we turn a basic checklist into a powerful operational tool? It all starts with the core fields.
The Essential Fields for Clarity and Accountability
Think of these as the non-negotiables. They’re the who, what, where, and when for every single maintenance task. Without this basic information, your PM program is built on shaky ground, leaving everything up to guesswork.
These are the fields I’ve seen make the biggest difference in eliminating ambiguity and creating a clear audit trail.
- Asset ID/Name: A unique identifier like "MTR-04B" is critical. It links the task directly to a specific motor, preventing any mix-ups when you have rows of identical equipment.
- Location: Be specific. "Production Line 3, Conveyor Drive" saves a technician precious minutes they would have spent hunting for the right asset.
- Task Description: Vague instructions are useless. Instead of "Check motor," a good description is action-oriented: "Visually inspect motor for signs of overheating and listen for unusual bearing noise."
- Estimated Time: This is crucial for scheduling and resource planning. It sets a realistic expectation for how long a job should actually take.
- Required Tools & Materials: Listing everything from a 1/2-inch socket wrench to a specific lubrication grease prevents those frustrating return trips to the tool crib.
- Completed By & Date: A simple signature or initial field drives accountability. It creates a bulletproof record of who did the work and when—invaluable for troubleshooting or during an audit.
Getting these fundamentals right is the difference between a vague suggestion and a clear directive. Building templates with this level of detail is a core part of creating solid maintenance documentation. If you need some inspiration on clarity and flow, exploring different business process documentation templates can be a huge help.
A robust template needs to cover more than just the basic "what to do." Here’s a quick look at the fields that will take your PM schedule from functional to fantastic, split between the absolute essentials and the advanced details that give you a competitive edge.
Essential vs. Advanced Fields for Your PM Template
| Field Name | Purpose and Importance | Type (Essential/Advanced) |
|---|---|---|
| Asset ID/Name | Uniquely identifies the equipment to prevent confusion. | Essential |
| Location | Pinpoints where the asset is to save technician time. | Essential |
| Task Description | Provides clear, actionable instructions for the work. | Essential |
| Estimated Time | Helps with scheduling and workforce management. | Essential |
| Required Tools & Materials | Ensures the tech has everything they need upfront. | Essential |
| Completed By & Date | Creates a record of accountability for all completed work. | Essential |
| Priority Level | Helps teams focus on the most critical tasks first. | Advanced |
| Safety Procedures (LOTO) | Explicitly calls out required safety protocols like Lockout-Tagout. | Advanced |
| Reference Documents | Links to OEM manuals, SOPs, or schematics for detailed guidance. | Advanced |
| Observations/Technician Notes | Captures on-the-ground intelligence and early warning signs. | Advanced |
This table gives you a roadmap. Start with the essentials to build a solid foundation, then layer in the advanced fields to really refine your maintenance operations.
Moving from Good to Great with Advanced Fields
Once you’ve nailed the basics, a few advanced fields can elevate your template from a simple schedule to a strategic tool. These columns add deeper context, reinforce safety, and create an invaluable feedback loop from your team on the ground.
This is where you start seeing the big-picture benefits really stack up.
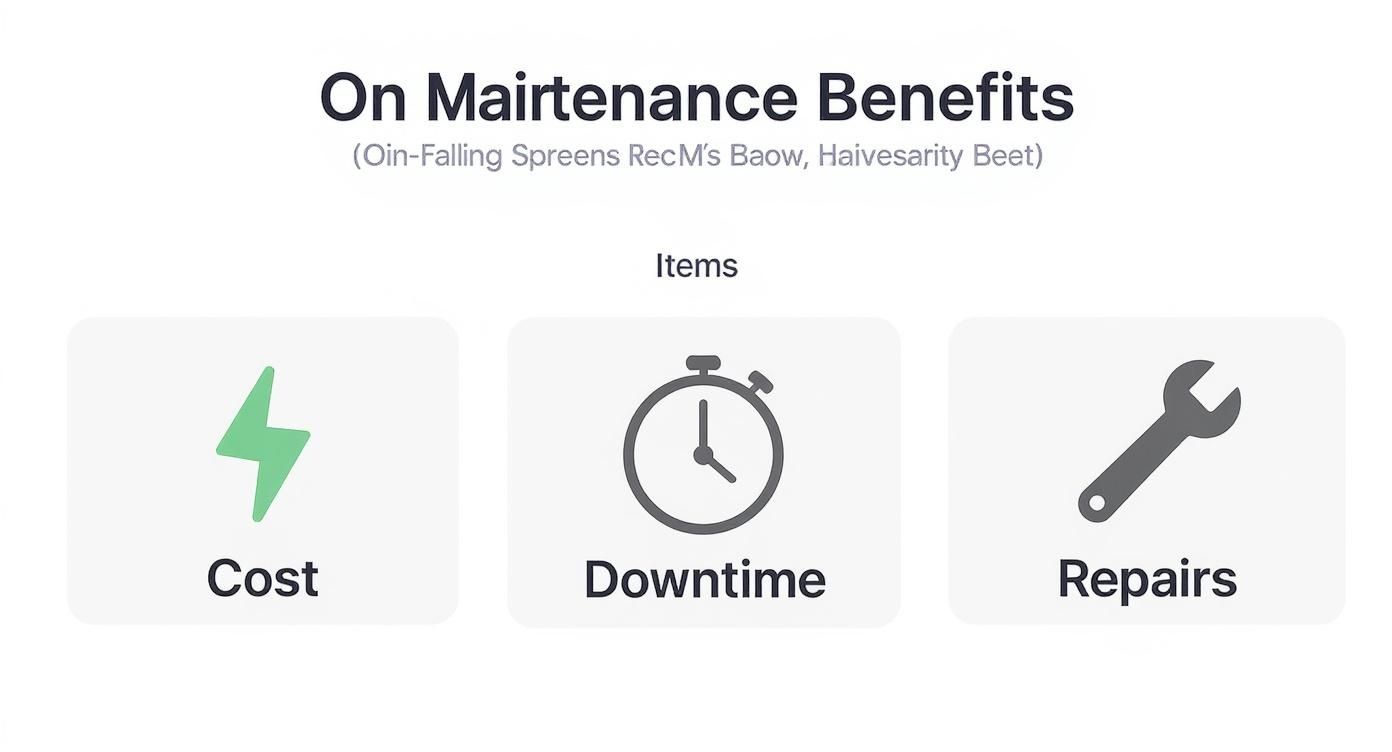
As you can see, a well-executed program directly hits the bottom line by cutting operational costs, slashing equipment downtime, and reducing the frequency of major, expensive repairs.
Here are the fields that separate a standard template from a world-class one:
- Priority Level: Not all PMs are created equal. A simple Critical, High, or Medium scale helps your team focus on what matters most when time and resources are tight.
- Safety Procedures (LOTO): For any task involving hazardous energy, this is a non-negotiable. Explicitly stating "Lockout-Tagout (LOTO) procedures required" reinforces your safety culture. This is a core part of the overall https://eandisales.com/uncategorized/protection-of-motors/ to keep both equipment and personnel safe.
- Reference Documents: Link directly to OEM manuals or schematics. Giving technicians instant access to the right information helps them do the job correctly the first time.
- Observations/Technician Notes: Honestly, this might be the most valuable field on the entire sheet. It’s a space for technicians to report what they’re actually seeing and hearing—things like, "Noticed slight vibration on startup" or "Seal appears to be wearing prematurely."
This 'Observations' section is your early warning system. It captures the subtle signs of impending failure that only an experienced technician would notice, turning your team into a proactive source of invaluable data.
By designing your preventive maintenance schedule template with this mix of essential and advanced fields, you’re creating much more than a schedule. You’re building a dynamic tool for communication, accountability, and continuous improvement.
How to Set the Right Maintenance Frequency
Figuring out how often to perform a maintenance task is one of the trickiest parts of building a solid preventive maintenance plan. If you get it wrong, you’re either burning cash on over-maintenance or staring down the barrel of a costly failure from doing too little. The secret isn't to guess; it's to build a framework that finds the sweet spot for every single asset.
Simply pulling a number out of thin air or slapping a generic "monthly check" on every motor just won't work. An effective schedule needs to be smarter, layering in the unique demands placed on each piece of equipment.
Start with Manufacturer Recommendations
Your first stop should always be the original equipment manufacturer (OEM) manual. These guidelines are your baseline, built on countless hours of engineering and testing. They’ll usually lay out tasks based on operating hours, cycles, or just good old calendar time.
But—and this is a big but—treat these as a starting point, not gospel. The OEM has no idea what your specific facility is like. That's where your team's real-world knowledge is absolutely essential.
Layer in Real-World Operating Conditions
The environment an asset lives in dramatically changes its maintenance needs. A motor humming along in a clean, climate-controlled room is going to wear completely differently than an identical one battling dust, moisture, and wild temperature swings in a foundry.
You have to adjust your frequencies based on these factors:
- Contamination: Is the area gritty, dusty, or exposed to corrosive chemicals? Dirty environments almost always demand more frequent lubrication and filter changes.
- Temperature: Extreme heat kills lubricants and electrical insulation. Extreme cold can make components brittle and prone to cracking.
- Vibration: If a machine is mounted near something that shakes the whole floor, you’ll need to check for loose fasteners and connections far more often.
Let's say the OEM suggests a 500-hour lubrication interval for a conveyor motor. If that conveyor is in a dusty cement plant, you'd be wise to shorten that to 350 hours to avoid a catastrophic bearing failure. On the flip side, if it’s in a pristine packaging facility, you might be able to safely stretch it out a bit.
Factor in Asset Criticality and Usage Patterns
Not all equipment is created equal. When a critical production line motor goes down, it's a disaster. When a non-essential exhaust fan quits, it’s an annoyance. Your maintenance frequency has to reflect that reality. The high-priority assets that keep the lights on deserve more frequent and intensive checks.
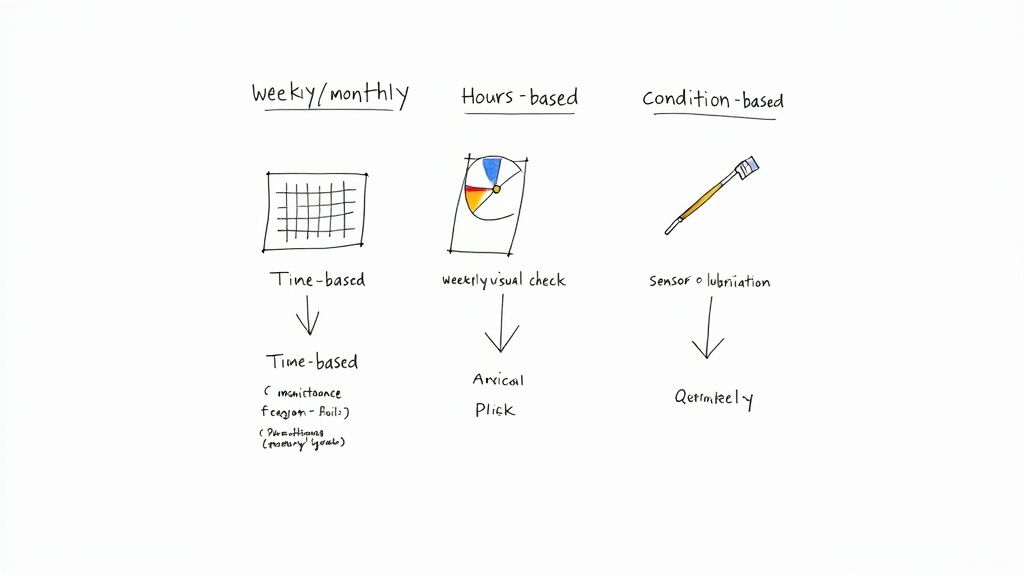
At the same time, look at how the equipment is actually used. Is it running flat-out 24/7, or does it only kick on a few times a day? This is where you decide on the right kind of trigger for the maintenance task.
- Time-Based: This is perfect for anything that degrades with age, like annual inspections or replacing batteries in a UPS. A fire suppression system, for example, has to be tested annually whether it was used or not.
- Usage-Based: This is the way to go for components that wear down with use, like motors, pumps, and mobile equipment. Scheduling an oil change every 250 operating hours is so much more accurate than just doing it "every three months."
- Condition-Based: This is the next level. Here, maintenance is only triggered when data shows it's needed—like a vibration sensor hitting a certain threshold or an oil analysis coming back with bad news. It stops you from doing work that isn’t necessary.
A well-planned schedule is also a huge part of workplace safety. It's a sobering fact, but around 30% of manufacturing fatalities are linked to maintenance activities. This statistic highlights just how crucial careful planning and strict adherence to safety protocols like lockout/tagout are. You can find more data connecting maintenance and safety over at Upkeep.com.
By combining OEM guidance with your own analysis of the environment and asset criticality, you graduate from a generic checklist to a truly tailored strategy. This makes sure your most important assets get the attention they need without wasting your technicians' valuable time on equipment that’s doing just fine.
Taking Your Template to the Next Level with a CMMS
A well-organized spreadsheet is a great first step for taming maintenance chaos, but honestly, it has its limits. If you really want to unleash the power of your preventive maintenance schedule, the next logical move is to a Computerized Maintenance Management System (CMMS). This is where your static template transforms into a living, breathing engine for your entire maintenance operation.
The good news is that the template we’ve built out maps almost perfectly to the fields in a typical CMMS. Think of it as a blueprint for your digital work orders. Your "Asset ID," "Task Description," and "Priority Level" fields don't just get copied over; they become the backbone of automated workflows that lift the manual burden from your planners and techs.
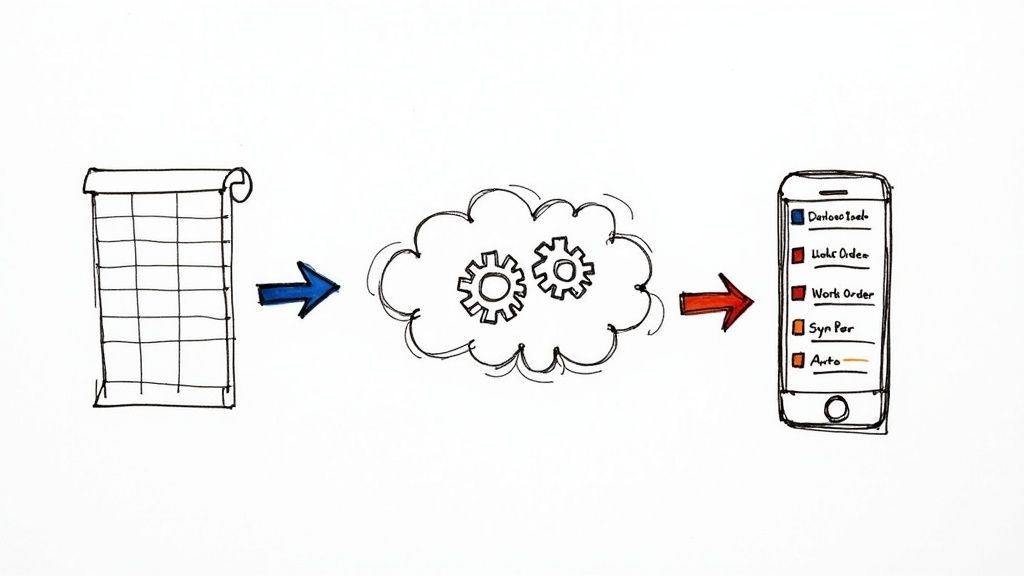
From Manual Lists to Automated Workflows
The real magic kicks in when the system starts doing the work for you. Instead of a planner poring over spreadsheets to see what's due, the CMMS handles it. Based on the frequencies you’ve set, it automatically generates and dispatches work orders to the right people with all the details they need.
You'll see the benefits almost immediately:
- Automatic Work Order Generation: The system triggers PMs based on time or runtime, so critical tasks never get missed.
- A Single Source of Truth: All maintenance history, technician notes, parts used, and downtime are logged against the asset in one central place.
- Effortless Reporting: Suddenly, tracking KPIs like PM compliance or Mean Time Between Failures (MTBF) is simple. You get clear, data-backed insights without the spreadsheet gymnastics.
- On-the-Floor Mobility: Techs can pull up schedules, view procedures, and close out work orders from a phone or tablet, right at the machine.
This shift from putting out fires to preventing them is why so many facilities are investing heavily. In fact, 88% of manufacturing facilities now use preventive maintenance. The industry is moving fast toward data-driven operations, and you can see more on these maintenance market trends over at Verdantis.com.
Integrating your schedule into a CMMS does more than just digitize a spreadsheet. It creates a unified system that connects your team, your equipment, and your biggest operational goals.
Prepping Your Template for a Painless Import
Getting your data from a spreadsheet into a CMMS can either be a seamless transition or a complete headache. The difference almost always comes down to how well you prepare. A clean, consistent template is your ticket to avoiding the garbage-in, garbage-out trap.
Before you even think about uploading that file, run through this quick sanity check:
- Standardize Your Naming: Make sure asset IDs are identical everywhere. To a computer, "MTR-01" and "Motor 01" are two completely different things. Pick a format and enforce it.
- Scrub Your Data: Get rid of any merged cells, weird special characters, or funky formatting. Keep it simple and clean.
- Fill in the Blanks: Do a quick spot-check for typos and make sure every required field—like Asset ID and Task Description—is filled out for every row. Missing data will throw errors during the import.
- Confirm Field Mapping: Know exactly which column in your spreadsheet will go into which field in the CMMS. A mismatch here can scramble your entire asset database.
Trust me, spending an hour or two cleaning up your data now will save you countless hours of frustration later. A solid data foundation is also the first step toward more advanced strategies. If you're curious about what’s next, our guides on predictive maintenance technology show where the industry is headed. A well-implemented CMMS is what gets you on that path.
Rolling Out Your New Maintenance Schedule
You’ve done the hard work of creating the perfect preventive maintenance schedule. That’s a huge win, but it's only half the battle. The real test is getting your team to actually use it day in and day out, making it a core part of how they work.
Let’s be honest: a brilliant plan that just sits in a folder is completely useless. A successful rollout is what turns your template from a document into a powerful tool for reliability.
The secret isn't some massive, company-wide launch that happens overnight. That’s a classic recipe for confusion, resistance, and a quick slide back into old, reactive habits. The smarter approach is a phased rollout that lets you iron out the wrinkles and build momentum from the ground up.
Start with a Pilot Program
Instead of throwing your entire operation into a new system all at once, pick a controlled environment for a trial run. This pilot program is your chance to see how the template holds up in the real world, get some honest feedback, and prove its value before going big.
I’ve seen this work best when you start with a single, well-defined area.
- One Production Line: This lets you see how the schedule fits into daily operations and affects a specific set of connected assets. It’s a self-contained test.
- A Group of Non-Critical Assets: Choosing equipment like facility HVAC units or your air compressors really lowers the stakes. If you hit a snag, it won’t bring production to a screeching halt.
The whole point of this pilot phase is to learn. Does a specific task take way longer than you estimated? Is a checklist item confusing? Is a tool missing from the list? Now is the time to find out and fix it.
Conduct Training That Actually Sticks
Good training is about so much more than just handing someone a spreadsheet and wishing them luck. You have to explain the "why." When technicians get that this new process is meant to make their jobs easier, prevent those frustrating breakdowns, and improve safety, you'll get buy-in instead of pushback.
Keep your training sessions practical. Grab a real asset from the pilot program and walk the team through the template right there on the floor. Show them exactly how to fill out each field and, most importantly, where to log their crucial observations. This needs to be a conversation, not a lecture.
A critical mistake is treating training as a one-and-done event. Real adoption happens when you create an open, continuous feedback loop. Make it clear that their on-the-ground experience is essential for making the schedule better over time.
Build Momentum with Early Wins
As your new PM schedule gets going, you have to be on the lookout for early successes—and celebrate them. Positive reinforcement is what builds momentum and helps shift the culture from reactive firefighting to proactive ownership.
Did the pilot line hit 100% PM compliance in the first month? Share that news. Did a technician's note in the "Observations" field catch a bearing about to fail? Recognize that person's contribution publicly.
These small victories are proof that the new system works. They create a powerful case for change that resonates far more than any top-down order ever could. This is how you start building a true culture of proactive maintenance.
Answering Common Questions About PM Schedules
Even the most meticulously crafted plan runs into real-world questions once it hits the shop floor. Let's dig into some of the most common hurdles managers and technicians face when they start using a new preventive maintenance schedule template. Getting these answers straight from the beginning makes the whole process smoother and gets everyone on board.
A great template is your starting point, but knowing how to flex and adapt it to the day-to-day chaos is what really makes it work. These are the kinds of practical questions that always seem to come up.
How Do I Prioritize Maintenance Tasks with Limited Resources?
This is the big one. It's the number one challenge for pretty much every maintenance department I've ever worked with. When you’ve got more tasks than time or technicians, smart prioritization is your best friend. The trick is to shift from just working down a list to adopting a risk-based approach.
Start by building a simple criticality matrix for your assets. You're essentially scoring each piece of equipment on two things: how catastrophic it would be if it failed, and how likely it is to fail in the first place. That critical conveyor motor that’s known to be a little finicky? It will always, always get attention before a redundant, lightly used pump.
Use that "Priority Level" field in your template to make this thinking official.
- Critical Priority: These are the non-negotiables. If you miss one of these tasks, you're looking at a potential safety incident or a full production shutdown. They have to get done on time, period.
- High Priority: These tasks are for essential equipment. A failure here would cause a major headache and disrupt operations, but it won't bring the whole plant to a standstill.
- Medium/Low Priority: This is where you can get efficient. These tasks cover less critical or redundant equipment. You can often bundle them by area to save a technician's time or schedule them during planned downtime.
What’s the Difference Between Preventive and Predictive Maintenance?
This one trips people up all the time, but the distinction is actually pretty simple. Think of it like a routine annual physical versus a specific MRI scan.
Preventive Maintenance (PM) is all about the calendar or the odometer. It's time-based or usage-based. Lubricating a motor bearing every three months or changing the oil in a truck every 5,000 miles are classic examples. You do the work regardless of the asset's current condition because you're trying to prevent a failure from ever happening.
Predictive Maintenance (PdM) is totally different—it's condition-based. It relies on technology like vibration analysis, thermal imaging, or oil analysis to listen to what the asset is telling you in real-time. You only step in to perform maintenance when the data shows that a component is starting to wear out and a failure might be on the horizon. It’s a much more targeted, "just-in-time" approach that can save a ton of unnecessary work.
Honestly, the best strategies I see today are a hybrid of both. They use high-tech PdM for their most critical, expensive assets and lean on a rock-solid PM schedule for everything else.
How Often Should I Review and Update My Maintenance Schedule?
Your PM schedule can't be a "set it and forget it" document. It has to be a living thing that evolves with your facility. As a good rule of thumb, you should sit down and do a formal, deep-dive review at least annually. This is your chance to look at the big picture—what worked, what didn't—and make strategic changes.
But that’s just the formal review. Your schedule needs to be updated on the fly as you get new information. Here are a few triggers that should prompt an immediate update:
- A recurring failure: If the same motor keeps burning out, that's a blinking red light. Your PM frequency is probably too long, or maybe you're not even doing the right tasks.
- Technician feedback: Your techs are on the front lines. If a task consistently takes way longer than you estimated, or if someone finds a smarter, faster way to do it, listen to them and update the template.
- New equipment: When a new asset is installed, it needs to get on the schedule immediately with its own PM plan based on the manufacturer's recommendations.
- Production changes: If a line suddenly goes from running one shift to running 24/7, its usage-based PMs need to be accelerated to match.
At E & I Sales, we know that a solid maintenance plan is built on a foundation of reliable equipment. We provide the premium electric motors and custom control solutions that keep your operations humming. If you're ready to build a more resilient and efficient system from the ground up, explore our offerings at https://eandisales.com.