
A multiwire branch circuit (MWBC) is one of those clever wiring tricks that saves a ton of material and labor on the job site. At its heart, it’s a setup where two or more circuits share a single neutral conductor.
Think of it like an electrical carpool lane. Instead of every car needing its own dedicated lane back to the start, multiple lanes of traffic (the hot wires) merge into one shared return lane (the neutral wire). It's a simple concept that makes a big impact.
What Are Multiwire Branch Circuits and Why Use Them
So, how does it work without overloading that one neutral wire? An MWBC isn't just about bundling wires together; it relies on a fundamental electrical principle. The two ungrounded (hot) conductors must be connected to different phases, or legs, of the electrical service.
In a standard single-phase 120/240V system, this means one hot wire lands on Leg A and the other on Leg B. This opposition is the secret sauce that makes the whole thing work safely.
The Principle of Current Cancellation
The real magic happens on that shared neutral. Because the hot wires are on opposite phases, their alternating currents are 180 degrees out of sync with each other. When one is pushing, the other is pulling.
This means the current on the shared neutral isn't the sum of the two circuits, but the difference between them. This is what we call the unbalanced load. For instance, if one circuit is pulling 12 amps and the other is pulling 10 amps, that shared neutral only has to carry 2 amps back to the panel. If you managed to perfectly balance the loads at 10 amps each, the neutral would carry zero current.
Key Advantages for Industrial Applications
This clever bit of physics delivers some serious practical benefits, especially in industrial plants and commercial buildings where you're dealing with long runs and lots of circuits.
- Reduced Material Costs: This is the big one. Fewer conductors mean less copper. Running a single 12/3 cable instead of two separate 12/2 cables adds up to huge savings on large projects.
- Smaller Conduit Fill: With fewer wires to pull, you can often get away with smaller conduit. Or, you can pack more circuits into existing conduit without violating fill codes, which saves a lot of headaches during retrofits.
- Lower Voltage Drop: Because the current on the neutral is often much lower than the current on the hots, it helps minimize voltage drop, especially over long distances. That means more stable power for your sensitive equipment.
This technique is nothing new; it’s been around since the early days of electrical distribution. In fact, some old-school electricians still call them 'Edison circuits' because of their historical connection to Thomas Edison's original three-wire systems. You can get more insights on the historical context of circuit protection and its evolution from sources like HomeInspector.org.
By sharing a single neutral, an MWBC effectively turns two circuits into a more streamlined, three-wire system. This efficiency is why plant engineers and system integrators continue to specify them for applications like office cubicles, lighting grids, and equipment racks.
Getting the NEC Safety Requirements Right
Look, multiwire branch circuits are fantastic for saving on wire and labor. But that efficiency comes with a catch: you have to be absolutely rigorous about following the safety rules in the National Electrical Code (NEC). These aren't just suggestions; they’re designed to prevent some very specific, very dangerous situations that can pop up with an improperly wired MWBC.
For any plant engineer, integrator, or electrician on the floor, getting these rules down cold is non-negotiable. Getting it wrong can lead to nasty electrical shocks, fried equipment, and having to tear everything out and start over. Let's break down the most critical section, NEC 210.4.
The All-Important Disconnecting Means
This is the absolute cornerstone of MWBC safety: you must have a way to shut off all the "hot" conductors at the same time. It’s a master-off switch for the entire circuit. When you flip that breaker, everything connected to it—both hot legs and that shared neutral—must go dead simultaneously.
Why is this a life-or-death rule?
Picture a technician working on a receptacle. They trace the circuit back to the panel, find what they think is the right breaker, and shut it off. Feeling safe, they open up the neutral wire. But here’s the problem: the other hot leg of the MWBC is still live and pulling a load.
The instant that neutral is disconnected, the return current has nowhere to go… except through the technician. That supposedly "dead" neutral wire they're holding instantly becomes energized at 120 volts. It's a terrifying and completely avoidable scenario.
NEC 210.4(B) Disconnecting Means
"Each multiwire branch circuit shall be provided with a means that will simultaneously disconnect all ungrounded conductors at the point where the branch circuit originates."
This is exactly why you're required to use either a 2-pole or 3-pole common trip circuit breaker. Another option is using individual single-pole breakers, but only if they're physically connected with an approved handle tie. This makes it impossible for someone to accidentally kill power to just one part of the circuit.
Grouping and Identifying Your Conductors
The NEC doesn't stop at the panel. It also demands that all conductors in an MWBC are grouped together for the entire run. From the breaker to the very last outlet, these wires need to stick together.
- Using Multi-Conductor Cable: If you're running something like a 12/3 Romex or MC cable, you're already covered. The wires are bundled in the sheathing.
- Pulling Wires in Conduit: When you're pulling individual THHN wires through conduit, you have to physically group them. Use cable ties or similar fasteners inside boxes and panels to make it obvious they belong to the same circuit.
This isn't just about neatness. It’s about preventing a deadly mix-up down the road. When the next electrician opens a junction box, they need to see at a glance which wires are a team. A loose, ungrouped neutral from a live MWBC could easily be mistaken for a spare from a different, de-energized circuit, leading right back to that open-neutral hazard. Properly managing circuit integrity is crucial, whether you're working on a plant floor or planning a home electrical panel upgrade.
The Tricky Rules for GFCI and AFCI Protection
Adding Ground-Fault (GFCI) or Arc-Fault (AFCI) protection to an MWBC isn't as simple as slapping in a standard device. If you use a single-pole GFCI or AFCI breaker or receptacle, you're in for a world of headaches.
The shared neutral is the culprit. These devices work by sensing an imbalance between the current on the hot and the neutral. On an MWBC, the neutral carries the unbalanced current from both hot legs, so a standard single-pole device will constantly see an "imbalance" and do its job: trip.
To get it right, you have two options:
- Use a 2-Pole GFCI/AFCI Circuit Breaker. This is the cleanest, most reliable solution. A 2-pole breaker is designed for an MWBC. It monitors both hot conductors and the shared neutral together, so it knows what normal operation looks like and won't nuisance trip.
- Install GFCI Receptacles at Each Outlet (with care). You can do this, but it’s tricky. You have to carefully pigtail the neutral at each box and be meticulous about the line/load connections. It’s far easier to make a mistake this way than by simply using the correct 2-pole breaker from the start.
Mastering these safety rules is just as vital as knowing the wire sizing and overcurrent protection details found in the NEC Tap Rule. A proper disconnecting means, clear conductor grouping, and the right fault protection are the three pillars that make MWBCs both a smart and a safe choice.
How to Properly Balance Loads and Size Neutral Wires
The real magic of a multiwire branch circuit is how it manages return currents, but unlocking that efficiency comes down to one critical principle: load balancing. In a perfect world, the loads on each ungrounded (hot) conductor would be identical. Their opposing currents would cancel each other out, and the shared neutral would carry absolutely nothing.
Of course, we don't work in a perfect world. Industrial and commercial environments are messy and unpredictable. The goal isn't perfection; it's reasonable balance. When a load is unbalanced, the shared neutral has to carry the difference in current between the phases. Getting a handle on this is non-negotiable for safety and performance.
The Dangers of Unbalanced Loads
Let's picture a simple 120/240V single-phase MWBC feeding a row of twenty workstations, each with a computer and a monitor. If ten stations are wired to Phase A and ten are on Phase B, the loads will probably be pretty close. But what happens when the IT department takes half the computers on Phase B offline for an update?
Suddenly, you could have Phase A pulling 14 amps while Phase B is only drawing 2 amps. That shared neutral is now carrying the 12-amp difference. This is a normal, safe condition—the neutral is sized to handle the full current of any single phase.
The real trouble starts when the loads aren't just unbalanced, but are dominated by modern electronics.
Harmonic Currents: The Hidden Neutral Overload
Non-linear loads are everywhere in today's plants and facilities. Think computers, variable frequency drives (VFDs), LED lighting drivers, and just about any device with a switch-mode power supply. Unlike a simple resistive load (like an old-school heater), these devices draw current in short, choppy pulses instead of a smooth sine wave.
These pulses create harmonic currents—basically, electrical noise at multiples of the standard 60 Hz frequency. On a balanced three-phase system, a funny thing happens: the third-order harmonics (180 Hz) from each phase don't cancel out on the neutral. They actually add together.
This creates an incredibly dangerous situation where your phase conductors might be well within their limits, but the neutral conductor is silently overheating from these additive harmonic currents. In some extreme cases, the current on the neutral can climb to 1.73 times the phase current.
Key Takeaway: When you're running non-linear loads on an MWBC, you can't just assume the neutral current will be low. Harmonic distortion can turn that shared neutral into a serious fire hazard if you don't size it correctly.
The infographic below breaks down the essential safety pillars—from the panel to the outlet—that you need to have in place to manage these risks.
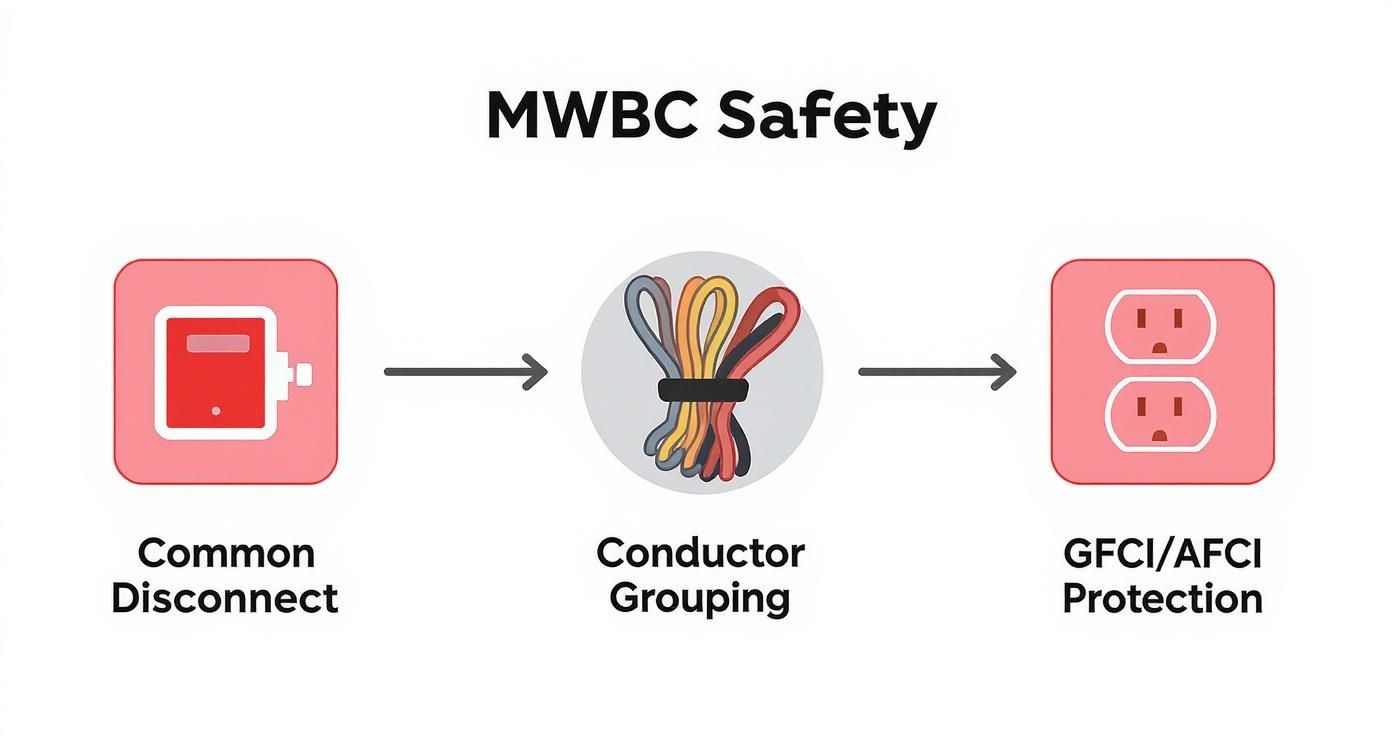
This shows that safety isn’t a single step. It starts with a common disconnect, requires proper conductor grouping in the conduit, and ends with the right kind of fault protection.
Sizing the Neutral Conductor Correctly
The National Electrical Code (NEC) doesn't mess around here. NEC 220.61 is clear: if a "major portion" of the load on a three-phase, four-wire MWBC is non-linear, you must count the neutral as a current-carrying conductor when you calculate ampacity adjustments (derating).
If you expect significant harmonics, you may need to go a step further and actually upsize the neutral conductor. Field studies in mission-critical facilities back this up, showing that balanced current loads are virtually nonexistent, leading to efficiency-killing harmonics.
Here's a quick cheat sheet for neutral sizing:
- Standard Loads: For circuits with mostly linear loads (incandescent lights, resistance heaters), the neutral can be the same size as the phase conductors.
- Non-Linear Loads: If you're feeding computers, office equipment, or electronic lighting, that neutral wire officially counts as a current-carrying conductor.
- Heavy Harmonics: In environments packed with VFDs and switch-mode power supplies, it's common practice to oversize the neutral. A popular approach is to use a neutral conductor rated for 200% of the phase conductor ampacity.
To illustrate how the math works out in different situations, let's look at a few examples.
MWBC Neutral Current Calculation Scenarios
The table below shows how the neutral current changes based on the type of system and the balance of the loads.
| Scenario | Phase A Current | Phase B Current | Phase C Current | Calculated Neutral Current |
|---|---|---|---|---|
| Balanced Single-Phase | 15 A | 15 A | N/A | 0 A (15A – 15A = 0A) |
| Unbalanced Single-Phase | 15 A | 5 A | N/A | 10 A (15A – 5A = 10A) |
| Balanced Three-Phase | 15 A | 15 A | 15 A | 0 A (Vector sum is zero) |
| Unbalanced Three-Phase | 15 A | 10 A | 5 A | 8.66 A (Vector sum calculation) |
As you can see, even in a "perfectly" balanced three-phase system, the neutral current is zero. But once the loads become unbalanced, the neutral immediately starts carrying current.
Proper sizing doesn't just prevent overheating; it helps with other power quality headaches, too. For a deeper look at how wire size affects system performance, check out our guide on voltage drop calculation formulas. It’s a huge factor in keeping equipment running smoothly, especially over long distances.
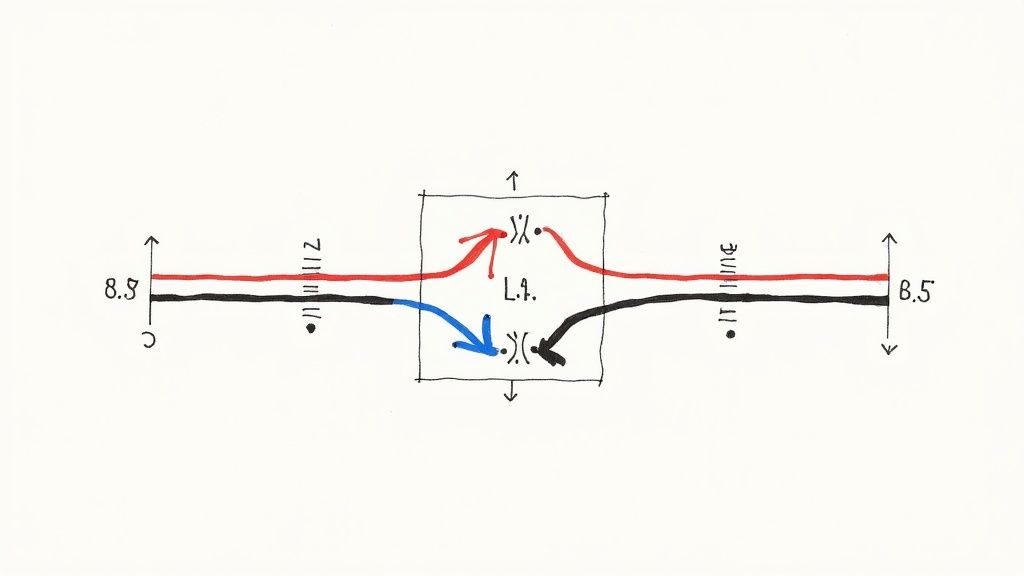
Practical Wiring Methods and Installation Best Practices
Moving from theory to practice is where the rubber meets the road with multi-wire branch circuits. Proper installation is the final, critical step that ensures an MWBC operates safely and efficiently for years to come. Getting the details right—from the panel to the last device—is absolutely essential for compliance and reliability.

The diagram above gives you a good look at a typical layout, but the core principles apply to any setup. Let's break down the most common configurations and highlight the best practices that prevent the most dangerous installation errors.
Landing Hot Wires on Opposite Phases
If you remember one thing, make it this: landing your hot conductors on different phases is the single most important step in wiring an MWBC. The entire concept of neutral current cancellation hinges on this. If they land on the same phase, that shared neutral will carry the sum of their currents, not the difference.
Picture two circuits, each pulling 15 amps. Wired correctly to opposite phases (say, Phase A and Phase B), the neutral only has to handle the unbalanced load. But if you accidentally land them both on Phase A, that neutral wire is now trying to carry a staggering 30 amps. That's a guaranteed overload that will melt insulation and create a serious fire hazard.
Critical Safety Check: Always use your voltmeter to confirm there is 240V (for a single-phase panel) or 208V (for a three-phase system) between the hot conductors of your MWBC. If you measure 0V, they are on the same phase and you need to fix it immediately.
Best Practices for Conductor Management
Once you leave the panel, keeping the MWBC conductors organized is just as important. A rat's nest of wires inside junction boxes or conduits is a recipe for dangerous mix-ups during future maintenance or troubleshooting.
Here are the non-negotiable rules for managing your conductors in the field:
- Group Conductors Together: The NEC is clear on this—all wires of an MWBC must be grouped together. If you're pulling individual conductors in a raceway, use wire ties or another method to keep them bundled inside enclosures.
- Pigtail Neutrals in Device Boxes: This is a big one. Never use the terminals on a receptacle to "daisy chain" the shared neutral from one device to the next. If that receptacle fails or gets removed, you've just created a hazardous open-neutral situation for everything downstream. Always connect the incoming and outgoing neutrals with a pigtail, sending just a single wire to the device.
- Maintain Consistent Color Coding: Stick to standard color codes (e.g., black and red for 120/240V; black, red, and blue for 120/208V). This simple habit makes it easy to identify your ungrounded conductors throughout the entire circuit run, saving time and preventing costly errors.
Properly managing conductors also means choosing the right enclosures. To learn more about selecting the correct hardware for your installation, you can explore the different electrical boxes types available.
Step-By-Step Installation Checklist
To make sure every MWBC installation is safe and compliant, follow this systematic process. Think of it as a framework for both new installations and for auditing existing circuits.
- Plan the Circuit: Identify the loads and confirm they're a good fit for an MWBC. Calculate potential unbalanced loads and consider any harmonic content.
- Select the Right Breaker: Choose a 2-pole or 3-pole common-trip breaker. If using single-pole breakers, make sure they have an approved handle tie.
- Land and Verify Phasing: Connect your hot wires to opposite phases at the panel. Use a multimeter to confirm the voltage between them is not zero.
- Group All Conductors: Run a multi-conductor cable or bundle individual wires in conduit for the entire circuit length. Keep them together.
- Pigtail All Neutrals: In every single junction and device box, use pigtails for the shared neutral to maintain circuit integrity. No exceptions.
- Install GFCI/AFCI Protection Correctly: The best and most reliable way to do this is with a 2-pole GFCI/AFCI breaker. Steer clear of using single-pole devices on MWBCs.
- Label the Panel: Clearly mark the MWBC in the panel directory. Make a note indicating which circuits are part of the shared neutral setup. This simple documentation is a critical safety measure for the next person who works on that panel.
Troubleshooting Common Faults and Safety Hazards
While a multi-wire branch circuit can save you a bundle on wire and labor, that shared neutral wire introduces some unique and downright dangerous failure modes. Every plant engineer and electrician needs to know these failure signatures by heart. Getting it wrong during troubleshooting doesn't just mean a callback; it can lead to catastrophic equipment damage or a life-threatening shock.
This is your field guide to the most common MWBC problems, starting with the absolute worst-case scenario: the open neutral.
An open or "lost" neutral is the Achilles' heel of an MWBC. When that shared return path gets broken somewhere between the load and the panel, the circuit doesn't just go dead. Instead, the loads on the two separate phases get wired in series across the full 240 volts.
Diagnosing the Treacherous Open Neutral
The dead giveaway of an open neutral is wild voltage swings. One leg of the circuit gets hit with a dangerous over-voltage while the other leg is starved with an under-voltage. On a standard 120/240V MWBC, you might measure a staggering 170V at one receptacle and a measly 70V at its counterpart. That kind of voltage spike will instantly fry sensitive electronics, control boards, and small motors.
If you get a call about flickering lights or a whole bank of equipment suddenly dying, an open neutral should be the first thing on your mind. Here’s how to systematically track it down:
- Start at the scene of the crime: Grab your multimeter and check the voltage right at the affected outlets or equipment terminals. If you see unstable or wildly incorrect voltages, you're on the right track.
- Trace the neutral back: Work your way backward from the load, meticulously inspecting every single neutral connection. Check the terminals in junction boxes, device boxes, and especially at the neutral bus bar in the panel.
- Look for the weak link: More often than not, the culprit is a loose wire nut, a failed back-stab connection on a cheap receptacle, or a wire that has simply vibrated loose over time in an industrial environment.
Safety Warning: Never, ever disconnect the neutral wire on a live MWBC. If there's any load on the hot conductors, that neutral is carrying the unbalanced current. Breaking that connection makes you the new path to ground, creating a serious shock hazard. Always kill the power to the entire circuit at the common-trip breaker before you touch a single wire.
Improper Breaker Setups and Other Hazards
Beyond the open neutral, a few other installation mistakes can create ticking time bombs. One of the most common is failing to use a proper common-trip breaker or at least a handle tie, which is a direct violation of NEC 210.4. When an installer just slaps two single-pole breakers next to each other, someone can easily shut off one phase for service while leaving the other one live. This creates the exact scenario where an unsuspecting technician gets zapped by a neutral wire they thought was dead.
This very safety issue is at the heart of an ongoing debate about using MWBCs versus running dedicated neutrals. The potential for neutral conductor overloads and fire risks has pushed the National Electrical Code (NEC) to mandate common-trip protection. Still, some experts argue that the risks aren't worth the savings, advocating for dedicated neutrals in all commercial and industrial settings. You can dive deeper into the evolution of these safety rules in various electrical system analyses, like this discussion on multiple circuits and safety considerations on scribd.com.
For critical industrial equipment like PLCs, VFDs, and sensitive control systems, the choice is clear for many engineers. They specify dedicated neutrals from the get-go. It eliminates the risks of shared wiring, from harmonic current issues to the ever-present danger of an open neutral. While a perfectly installed MWBC is code-compliant, the high-stakes environment of a modern plant often justifies the extra cost of separate neutrals for maximum reliability and safety.
A Few Common Questions From the Field
Even when you have the theory down cold, multi-wire branch circuits have a way of throwing a few curveballs on the job site. These circuits touch on so many specific corners of the National Electrical Code (NEC) that knowing how to handle common situations is key to a safe, compliant install.
Let's tackle some of the most frequent questions that pop up for plant engineers, electricians, and integrators working with MWBCs. We'll cut through the confusion with clear, direct answers to help you make the right call.
Can I Use a Multiwire Branch Circuit for Kitchen Countertops?
The short answer is yes, you can use an MWBC for the small-appliance circuits in a kitchen, but the rules are incredibly strict. Kitchens are a bit of a special case, needing at least two dedicated circuits for those countertop receptacles. An MWBC is often the go-to for running this efficiently.
Here's the catch: these circuits demand ground-fault protection. You can't just slap two separate GFCI receptacles on the same MWBC. Because of that shared neutral, you'll create an imbalance that causes constant, maddening nuisance tripping.
The only way to do this right is to put the protection at the source. That means you must use a 2-pole GFCI circuit breaker in the panel. This single device protects both circuits, properly monitors the shared neutral, and checks the box for the NEC's simultaneous disconnect requirement.
What Happens If Both Hot Wires Are on the Same Phase?
This is, without a doubt, one of the most dangerous mistakes you can make with an MWBC. Wiring both hot conductors to the same phase completely destroys the principle of current cancellation that makes the circuit work, creating an immediate and serious fire hazard.
An MWBC is designed so the opposing currents from different phases cancel each other out on the shared neutral. But when you land both hots on the same phase, the currents are no longer opposing—they're working together. Instead of canceling out, they add together on the neutral.
Think about it: if one circuit pulls 15 amps and the other also pulls 15 amps, that neutral wire is suddenly forced to carry a staggering 30 amps. A 12-gauge wire, sitting behind a 20-amp breaker, will overheat and melt its insulation long before that breaker even thinks about tripping. That's a recipe for an electrical fire, and it's why you must always verify you have 240V (or 208V in a 3-phase system) between the hot conductors at the panel.
Are Multiwire Branch Circuits Being Phased Out?
Not at all. Multi-wire branch circuits are not being removed from the NEC, and they remain a perfectly valid and cost-effective wiring method. What has happened is that the safety rules around them have gotten tighter over the years to patch up historical risks and head off common installation mistakes.
The biggest game-changer was the mandate in NEC 210.4 for a simultaneous disconnecting means. This rule, which requires a common-trip multi-pole breaker or an approved handle tie, was put in place to eliminate the deadly open-neutral hazard that could happen if a technician only shut off one leg of the circuit for maintenance.
While MWBCs are perfectly fine when installed by the book, some engineers and designers are now opting for dedicated neutrals for every circuit, especially in critical or sensitive industrial settings. It simplifies troubleshooting and completely sidesteps the unique risks of a shared neutral. In the end, the choice often comes down to balancing the material cost savings of an MWBC against the simplicity and risk profile of the application.
At E & I Sales, we specialize in providing reliable, code-compliant solutions for complex industrial applications. Whether you're designing a new system or upgrading an existing facility, our team offers the deep product expertise and practical field experience to ensure your motor control, automation, and power distribution projects are a success. Connect with us today to discuss your next project.