
A truly proactive motor control center maintenance program is built on a foundation of rigorous safety prep, not last-minute fixes. It’s about creating a bulletproof plan before you ever open a cabinet—establishing clear Lockout/Tagout procedures, gearing up with the right arc flash PPE, and digging into the technical docs. This upfront work ensures every action you take is safe, informed, and actually effective.
Establishing Your MCC Maintenance Foundation
Before a single tool touches a motor control center, the real work has already begun. Laying the groundwork for safety and efficiency is everything. I’ve seen too many teams jump right in, and it's a dangerous mistake that leads to accidents, fried equipment, and painful stretches of downtime.
Effective maintenance isn't just about turning wrenches; it's about building a systematic, safety-first culture around these critical assets.
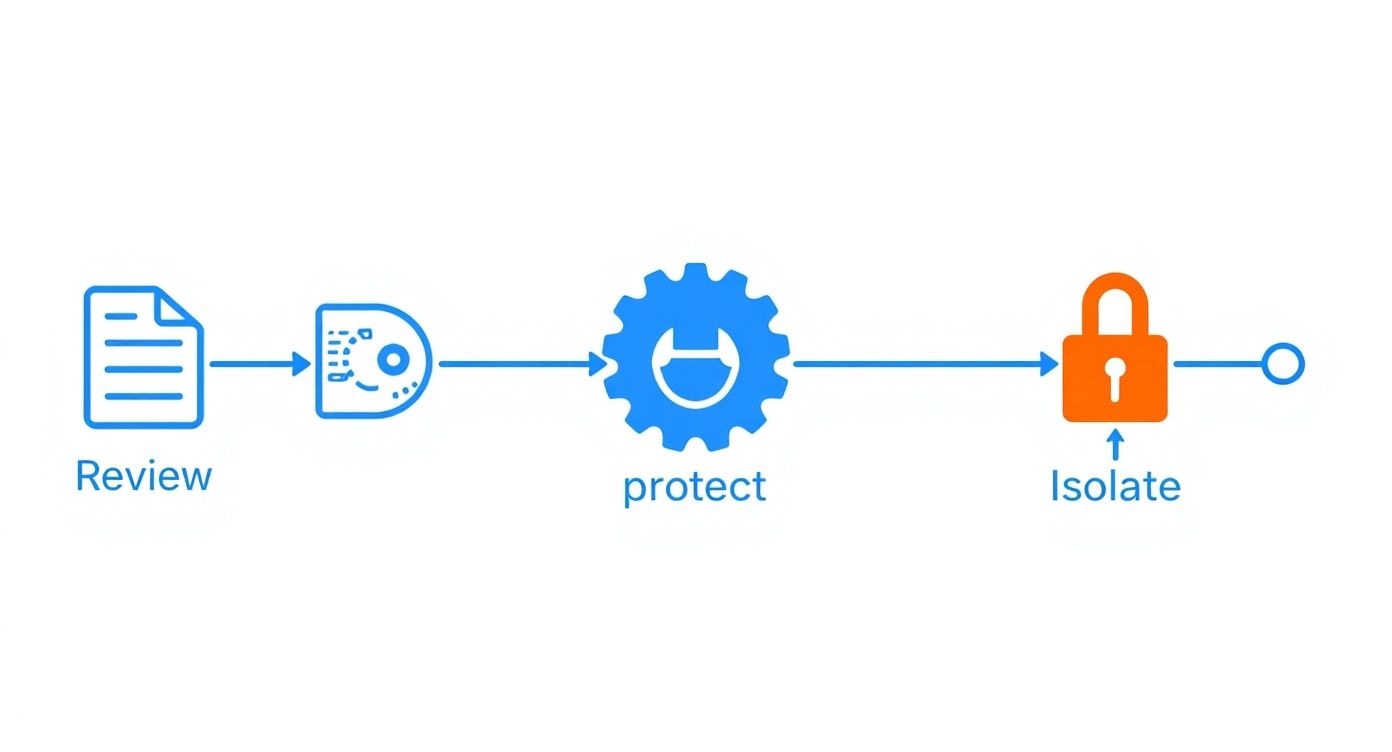
This foundation really comes down to three things: completely isolating energy sources, protecting your people, and knowing the equipment's history inside and out. If you drop the ball on any one of these, you're introducing massive risk and turning a controlled procedure into a high-stakes gamble.
Fortifying Safety with Lockout/Tagout Protocols
A rock-solid Lockout/Tagout (LOTO) procedure isn't just a suggestion—it's the absolute cornerstone of safe MCC maintenance. This is way more than just flipping a switch. It's a documented, verifiable process that guarantees all energy sources are dead and locked out before anyone gets started. For complex MCCs, that often means tracking down multiple power feeds, sneaky control circuits, and even the stored energy lurking in capacitors.
Your LOTO program has to be specific to each piece of gear. A generic, one-size-fits-all checklist just doesn't cut it. Here’s what a proper procedure looks like in the real world:
- Detailed Shutdown Steps: It clearly maps out the sequence for de-energizing, isolating, and securing every single energy source. No ambiguity.
- Verification of Isolation: This is the big one. A qualified person must test for the absence of voltage with a properly rated multimeter before work begins. It’s a non-negotiable step.
- Clear Lock and Tag Application: It defines exactly who is authorized to apply locks and tags, making sure every worker involved has their own personal lock on the isolation point.
- Shift Change Procedures: It lays out how LOTO is handed off between shifts to maintain a continuous bubble of safety.
The single most critical moment in any electrical maintenance task is proving the absence of voltage. Never, ever assume a circuit is dead. Always test, verify, and then test again before you proceed.
Selecting the Right Personal Protective Equipment
Personal Protective Equipment (PPE) is your last line of defense against the brutal physics of an arc flash. Let's be clear: standard work gloves and a hard hat are not going to cut it when you're working on or near an energized MCC. The level of PPE you need is determined by an arc flash risk assessment, which calculates the potential incident energy at that specific spot.
This risk is broken down into PPE Categories by NFPA 70E, ranging from 1 to 4. For instance, getting into a 480V MCC might call for Category 2 PPE. That typically means an arc-rated shirt and pants, an arc flash suit hood, and voltage-rated gloves with leather protectors. Always look for the arc flash label on the MCC panel—it will tell you the incident energy level and the required PPE category for working safely.
Gathering and Reviewing Essential Documentation
Walking into a maintenance job blind is a recipe for disaster. Before you even think about starting, your team needs to gather and review all the relevant documentation. This paperwork is your roadmap. It helps technicians understand the system's design, its operational history, and all its little quirks. If you're new to the equipment, just understanding what a motor control center is through some foundational reading can provide crucial context.
Here are the key documents you need in hand:
- One-Line Diagrams: These show the power flow through the MCC, identifying sources, feeders, and major components.
- Schematics and Wiring Diagrams: These give you the nitty-gritty details on control circuits, interlocks, and how everything is connected.
- Previous Maintenance Logs: This is gold. It offers insights into past problems, repairs, and recurring issues that can help guide your inspection.
Reviewing this documentation lets you plan the scope of work, spot potential challenges ahead of time, and make sure you have the right spare parts and tools ready to go.
Your Proactive MCC Inspection Schedule
A reliable motor control center doesn't just happen. It's the direct result of a smart, consistent inspection schedule. If you're still stuck in the old "fix-it-when-it-breaks" loop, you're falling behind. In today's highly automated plants, unexpected downtime can easily eat up 20-30% of your production losses. That’s a massive, and frankly, unnecessary hit to the bottom line.
Building a rhythm of daily, monthly, and annual checks is the key. It transforms motor control center maintenance from a chaotic, reactive fire drill into a predictable, value-adding part of your operation. This is about catching the small stuff long before it has a chance to become a plant-stopping catastrophe. When everyone from floor operators to senior techs is involved, you create a culture of reliability.
This is the fundamental workflow for any maintenance task. It's a simple but powerful reminder: always review the documentation, put on the right gear, and properly isolate the equipment. Following this sequence every single time is non-negotiable for keeping your team safe and ensuring the job gets done right.
MCC Maintenance Schedule At a Glance
To make this easier to manage, here's a quick breakdown of what to focus on and when. This table summarizes the core tasks, helping you build a comprehensive plan that covers all your bases.
| Frequency | Key Mechanical Checks | Key Electrical Checks | Key Safety Checks |
|---|---|---|---|
| Daily | Visual check for obstructions, loose parts, or physical damage. | Listen for unusual buzzing or humming. Check indicator lights. | Confirm area is clean, dry, and free of clutter. |
| Monthly | Verify cooling fan operation and check air filters for buildup. | Visually inspect terminal blocks for discoloration or heat. | Test pilot lights and annunciators. Ensure all labels are legible. |
| Annually | Torque all connections. Lubricate moving parts (stabs, breakers). | Perform thermal imaging, insulation, and contact resistance tests. | Verify grounding. Test breaker trip mechanisms and interlocks. |
This schedule isn't just a checklist; it's a framework for consistency that drives long-term equipment health and operational stability.
The Power of Daily Walk-Throughs
The most frequent checks are often the simplest, but don't underestimate their power. These are quick sensory inspections that your plant operators can—and should—be doing on their regular rounds. We're not talking about a deep diagnostic analysis here; the goal is to spot anything that’s different from yesterday.
Train your operators to use their eyes, ears, and even nose to pick up on early warning signs. A faint, new buzzing sound or a slight discoloration on a panel might be the very first clue that something is starting to go wrong.
Here's what they should be looking for daily:
- What You Hear: Listen for any unusual humming, buzzing, or crackling coming from transformers and contactors. A healthy MCC has a steady, low hum. Anything else needs a closer look.
- What You See: Scan for any visual signs of overheating. This often looks like discoloration or darkened spots on enclosures, bus bars, or wire insulation.
- What’s Around It: Make sure the area around the MCC is clean, dry, and completely clear of obstructions. Clutter can block critical airflow, leading to overheating, and it's a major safety hazard.
Monthly Hands-On Verifications
Monthly checks take things a step further than the daily walk-through. This is where a qualified technician gets a bit more hands-on. While these inspections are still mostly visual and non-intrusive, they focus on actively verifying the operational status of key components.
I remember one facility where a routine monthly check found a single, loose control wire on a critical starter. The constant vibration from nearby machinery was slowly working it free. It took less than five minutes to tighten that one connection. That simple fix prevented a plant-wide shutdown that would have cost the company tens of thousands of dollars for every hour they were down.
That’s the real value of proactive maintenance. You turn a potential catastrophe into a minor, two-minute adjustment. A few minutes of prevention truly saves days of cure.
On your monthly tour, zero in on these areas:
- Pilot Lights and Indicators: Don't just look at them—manually test all pilot lights and indicator lamps to make sure they actually work. A burnt-out bulb could be hiding a serious fault.
- Ventilation and Filters: Check that every cooling fan is spinning freely and that the filters are clean. Clogged filters are one of the top causes of overheating inside MCC cabinets.
- Control Circuit Connections: Get a good look at the terminal blocks. You're looking for clean, tight wiring with zero evidence of heat damage or discoloration.
The Annual Deep-Dive Inspection
The annual inspection is the big one. This is the most intensive part of your motor control center maintenance program, where the equipment is fully de-energized, locked out, and given a complete, thorough service. Think of it as a comprehensive health check-up for your entire MCC.
This deep dive is your chance to uncover hidden problems that are impossible to spot during normal operation. It requires specialized test equipment and is absolutely critical for verifying the integrity of your whole electrical system.
Your annual checklist must include:
- Thermal Imaging (Thermography): Before you shut anything down, perform a thermal scan of the MCC while it's under a normal load. This will instantly show you high-resistance connections and overloaded components by revealing hotspots invisible to the naked eye.
- Insulation Resistance Testing: Grab a megohmmeter (or "Megger") and test the insulation resistance of the bus bars and all major cabling. This helps you find any degradation in the insulation before it can lead to a dangerous short circuit.
- Contact Resistance Checks: For your circuit breakers and contactors, measure the resistance across the closed contacts. High resistance is a dead giveaway for pitting or wear and a clear sign that a failure is on the horizon.
- Torque Verification: Break out a calibrated torque wrench and check every single electrical connection against the manufacturer's specifications. Loose connections are still the number one cause of electrical failures. Period.
With your inspection schedule locked in, it's time to get your hands dirty. This is where the real work of any solid motor control center maintenance program happens—moving from just looking at things to physically ensuring they're safe, reliable, and built to last.
This isn't just about going through the motions. How you handle these tasks separates a well-oiled MCC from a ticking time bomb. We'll break it down into four critical areas: mechanical cleaning, electrical connection integrity, protective device testing, and proper lubrication. Each one is a crucial piece of the puzzle.
Mechanical Cleaning for Optimal Performance
Don't underestimate dust and grime. In an MCC, they're not just ugly—they're a legitimate threat. A thick layer of industrial dust acts like a blanket, trapping heat and forcing components to run hot. This heat slowly cooks wire insulation and electronics, paving the way for an early failure.
Worse yet, if that dust has conductive particles (think metal shavings from a machine shop), it can create tiny bridges for electricity to cross, leading to a short circuit. Cleaning has to be done right.
- Vacuum First: Start with a good vacuum that has a HEPA filter and non-conductive attachments. This gets rid of loose debris without just blowing it deeper into the equipment.
- Use Approved Solvents: For the tough stuff, use a lint-free cloth and an approved, fast-drying electrical cleaning solvent. Never spray any liquid directly into the MCC.
- Compressed Air with Caution: If you have to use compressed air, make sure it’s clean, dry, and free of oil. Use low pressure and aim the airflow to push contaminants out of the enclosure, not into sensitive spots like relays.
The Critical Art of Torquing Connections
Simply "tightening all connections" is a recipe for disaster. The goal is to torque all connections to manufacturer specifications. Overtightening is just as bad as a loose connection—it can stretch bolts, strip threads, and even warp bus bars, creating new hot spots.
You absolutely need a calibrated torque wrench for this. An uncalibrated one is just a fancy breaker bar, giving you a false sense of security. The whole point is to get the perfect clamping force for a solid, low-resistance connection that won't back off from heat cycles and vibration.
A shocking number of electrical failures boil down to one thing: a loose connection. Using a calibrated torque wrench isn’t just a nice-to-have; it's one of the most powerful preventative tasks you can perform.
Here’s a pro tip: After torquing, use a torque seal or paint marker to draw a line from the bolt head to the terminal. Next time you're in there, a quick glance will tell you if anything has vibrated loose. It's also a great idea to keep a log of the specified torque values for each section of your MCC.
Testing and Verifying Protective Devices
The circuit breakers, fuses, and overload relays are the silent bodyguards for your expensive motors. You can't just assume they're ready to do their job. These devices need to be tested to prove they will actually trip when a fault occurs. An overload relay that doesn't trip can turn a simple problem into a catastrophic motor burnout.
This requires specialized test equipment that can inject a controlled current to simulate an overcurrent or fault.
- Primary Current Injection: This is the gold standard. The test set pushes a high current through the entire breaker or overload, testing every part of the system from the sensor to the trip mechanism.
- Secondary Current Injection: This is a quicker, more common test. It checks the trip unit's "brain" and mechanics without sending high current through the main conductors. It's a fantastic way to verify the electronics are working correctly.
The results are compared against the manufacturer's time-current curve (TCC). If a device trips too slowly—or not at all—it’s no longer protecting your equipment and needs to be adjusted or replaced. Knowing the essentials of motor protection is key here, and you can dive deeper into the core principles of the protection of motors to build your team's skills.
Lubrication of Mechanical Systems
Finally, let's talk about the moving parts. Disconnect handles, racking mechanisms, and breaker stabs all need the right lubrication to work smoothly and safely. A handle that's seized up is a major safety hazard, especially in an emergency.
Stick to the manufacturer-recommended lubricant. The wrong grease can attract more dirt, attack plastic parts, or dry out and make the problem even worse. All you need is a thin, clean film of lubricant to cut down on friction without becoming a dust magnet. This simple step makes all the difference when you need to rack out a breaker or throw a disconnect in a hurry.
Using Predictive Technology to Prevent Failures
The best motor control center maintenance strategy is one that catches failures before they even think about happening. When you move past simple scheduled inspections, you start transforming MCC upkeep from a chore into an intelligent, data-driven process. This approach lets you put your time and resources exactly where they’re needed most, which is a massive win for cutting down unplanned downtime.
Predictive tools essentially give you x-ray vision into your equipment while it's running, uncovering threats you'd never see otherwise. Think of it as giving your MCC a high-tech check-up, spotting the small stuff when it's still small and easy to fix. This switch from reactive repairs to proactive intervention is a total game-changer for plant reliability.

Uncovering Hidden Hotspots with Thermal Imaging
One of the most powerful tools in your predictive toolkit has to be thermal imaging, or thermography. A thermal camera sees infrared energy, painting a picture of temperature differences. For an MCC, that's pure gold. It helps you instantly spot overloaded circuits, high-resistance connections, and failing components that are starting to run hot.
You just can't see these problems with the naked eye. I've seen it countless times: a routine thermal scan shows one breaker in a bucket running 15-20°C hotter than the identical units right next to it. That's an immediate red flag for a loose connection or a dying component, letting you schedule a quick fix during planned downtime instead of dealing with a catastrophic failure in the middle of a production run.
Listening for Trouble with Vibration Analysis
While thermal imaging is king for electrical issues, vibration analysis is your go-to for sniffing out mechanical problems in the motors themselves. Every motor has a specific vibration "signature" when it's running perfectly. Specialized sensors can pick up on tiny changes to that signature, giving you a heads-up on problems like:
- Bearing Wear: This is the most common cause of motor failure, and it creates a very distinct high-frequency vibration.
- Misalignment: When the motor shaft isn't perfectly lined up with its load, it causes serious vibration and stress.
- Imbalance: Problems with rotors or connected fans can throw things off balance, leading to a ton of premature wear and tear.
Catching these things early means you're replacing a bearing for a few hundred bucks instead of a whole motor for tens of thousands. This is especially important for motors on complex drives; a good handle on variable frequency drive basics is crucial for figuring out if the problem is the motor or its controller.
Predictive maintenance isn't about replacing parts on a schedule; it's about replacing the right part at the right time. It's the difference between scheduled surgery and a trip to the emergency room.
Leveraging IoT for Continuous Monitoring
The next real frontier in MCC maintenance is integrating Internet of Things (IoT) sensors. Forget about doing periodic checks—IoT allows for continuous, real-time data collection on everything from temperature and current draw to voltage. This constant stream of information builds an incredibly accurate performance baseline for every single motor and starter.
This is where you see advanced strategies like predictive maintenance for MEP using IoT sensors really shine. The moment any reading strays from its normal baseline, the system can fire off an automatic alert to the maintenance team, pointing them to the exact component that needs attention.
This isn't just a trend; it's rapidly becoming the standard. In 2023, around 61% of newly installed MCCs came with IoT-enabled monitoring baked in. We saw the adoption of this tech jump by 48% between 2020 and 2023 alone. The data points to a clear industry shift toward smarter, more connected equipment that puts uptime first. By bringing these technologies into your facility, you're not just preventing failures—you're building a more resilient and efficient operation from the ground up.
Smart Documentation and Lifecycle Management
The best maintenance plan in the world doesn't mean much if the knowledge evaporates the second the job is done. Your real power comes from turning those maintenance actions into future intelligence. That's where meticulous records and a forward-thinking lifecycle plan come in. This documentation is your single most valuable tool for spotting wear trends, troubleshooting problems down the road, and proving you're meeting compliance standards.
Think about it: without a detailed history, you're flying blind with every new issue. Every inspection, every repair, every test, and every part swap needs to be logged with dates, technician notes, and specific measurements. This data trail becomes the living biography of your equipment.
Building Your Maintenance Logbook
Your maintenance log is so much more than a simple notebook; it’s a critical operational asset. It doesn't matter if it's a high-tech CMMS (Computerized Maintenance Management System) or a well-organized physical binder—consistency is what counts.
Vague entries like "checked starter" are completely useless. You need actionable detail. A solid log entry should always include:
- Asset ID: The specific MCC and bucket number.
- Date and Time: Exactly when the work was performed.
- Technician(s) Involved: Who was on the job.
- Description of Work: Be specific (e.g., "Performed annual torque check on main lugs and starter terminals").
- Specific Findings: What did you find? Include real numbers (e.g., "L1 lug torqued to 275 in-lbs, L2 to 270 in-lbs, L3 to 275 in-lbs") or observations ("Found discoloration on overload relay contacts for motor P-101").
- Parts Used: List any replacement components and their part numbers.
This level of detail is a goldmine. It allows you to analyze failure rates, track component aging, and predict when certain parts might need attention before they fail. It’s also a great way to spot knowledge gaps in your team, which is why it's so important to understand how to measure training effectiveness.
Strategic Spare Parts Management
Downtime is brutally expensive, but so is a warehouse crammed with spare parts you'll never use. The real goal is to build a smart, lean inventory based on your MCC's actual components and their known failure rates—all information you can pull directly from those detailed maintenance logs.
Don't fall into the trap of stocking one of everything. Focus your capital on the critical, long-lead-time components. Think specific overload relays, unique control transformers, or proprietary electronic modules. Standard fuses and contact kits can almost always be sourced more quickly when needed.
For instance, if your logs show that a particular model of contactor fails every three to four years across multiple buckets, it's a no-brainer to keep a few on the shelf. On the other hand, a main circuit breaker with a perfect track record probably doesn't warrant an expensive on-site spare.
Navigating Upgrades and Retrofits
Every MCC eventually hits a point where maintenance feels like a losing battle against obsolescence. When replacement parts get scarce or the equipment no longer meets modern safety standards like NFPA 70E, you have a choice: retrofit or replace.
A retrofit can be a great, cost-effective move. Upgrading old-school electromechanical overloads to modern electronic units can breathe new life, functionality, and reliability into an otherwise solid MCC structure. But if you’re dealing with a compromised bus bar system or a failing enclosure, a full replacement is often the safer and more economical long-term solution.
The decision really boils down to a clear cost-benefit analysis. You have to weigh the rising cost of maintenance and downtime for the old unit against the capital investment of a new one. This is especially relevant in a growing market. The global motor control center market was valued at USD 6.5 billion in 2024 and is projected to hit USD 10.2 billion by 2033, a surge driven by automation and the need for ever-more-reliable equipment. You can learn more about this trend and its impact on industrial operations at IMARC Group. Smart lifecycle management ensures you're investing wisely in this expanding field.
Your Top MCC Maintenance Questions, Answered
Even with the best-laid plans, questions always pop up when you're in the thick of maintaining a motor control center. It's just the nature of the beast. Facility managers and the techs on the floor often run into the same hurdles and have to make the same tough calls.
Let's clear the air on some of the most common questions we get from the field. These aren't textbook answers; they come from years of hands-on experience troubleshooting, maintaining, and upgrading these critical pieces of equipment.
How Often Should We Be Running Thermal Imaging on an MCC?
For most critical systems, annual thermal imaging is the gold standard. The key here is that the scan must be done while the MCC is energized and under a normal load. An unloaded MCC won't show you the thermal hotspots that indicate high-resistance connections, which defeats the whole purpose.
But don't treat that as a hard-and-fast rule. If your MCC lives in a rough neighborhood—think high ambient heat, tons of dust, or constant vibration—you'd be smart to bump that up to semi-annually. This gives you a much better chance of catching things like loose connections or overloaded circuits long before they turn into a catastrophic failure.
What Are the Most Common Points of Failure?
You might be surprised to learn that the biggest headaches in an MCC often start with the smallest parts. In our experience, a handful of specific components are behind the vast majority of failures.
Keep a close eye on these usual suspects:
- Loose Terminal Connections: This is, hands down, the number one cause of overheating and electrical faults. It's almost always driven by vibration and the constant expansion and contraction from thermal cycling.
- Control Component Failure: Relays and contactors are mechanical devices, and they wear out. All that constant cycling takes a toll on the coils and contacts.
- Starter Coil Burnout: Whether it's from overvoltage, undervoltage, or just old age, starter coils eventually give up the ghost, taking the whole motor circuit down with them.
- Insulation Degradation: Over the years, heat and environmental junk break down wire insulation, which is a ticking time bomb for short circuits.
The overwhelming majority of MCC faults trace back to a mechanical issue, not a purely electrical one. A loose wire, a worn contact, or a stuck relay is often the root cause—which is exactly why hands-on inspections and torque checks are so vital.
When Should We Retrofit vs. Replace an Entire MCC?
The "repair or replace" debate for an aging MCC usually boils down to a few key factors. If your unit is pushing 20-25 years old, just tracking down compatible spare parts can turn into a full-time, expensive scavenger hunt.
But age isn't the only factor. Watch out for these other red flags:
- Rising Failure Rate: If your maintenance logs show a clear trend of more frequent failures and downtime, that unit is on its last legs.
- Outdated Safety Standards: Older MCCs were built in a different era. Many simply can't meet modern arc flash safety requirements, and that puts your people at risk.
- Exceeded Capacity: Your facility has grown, but has your MCC? If you're pushing its original design capacity, you're borrowing trouble. It's time for an upgrade.
Most of the time, a simple cost-benefit analysis makes the decision for you. When you compare the rising cost of emergency repairs and lost production against the investment in a new, safer, and more reliable system, the right path forward becomes pretty clear.
When it's time to upgrade, retrofit, or design a new system, having an expert partner makes all the difference. E & I Sales provides engineered UL-listed control panels and turnkey integration services to ensure your motor control solutions are reliable, safe, and built for the long haul. Let's discuss your next project.